Introduction
TCEQ FTPS is based on secure FTP and is provided as a way to share files. Files can be shared within the agency, shared by TCEQ with the public, and shared by the public with TCEQ. Small files are often shared in email, which has a 25 MB size limit for e-mail attachments within TCEQ. This application is provided as a way to share larger files. Files are shared for a limited amount of time.
File Retention Policy
Files will be available as shared on the server for 7 days. Shared files should be downloaded to a more permanent storage location. If files are needed longer than 7 days and are not saved to another location, the files will need to be re-shared by uploading the files again.
Accounts
TCEQ FTPS can be used by TCEQ staff, as well as the public. All staff can sign in to the FTPS web interface using their network credentials, but in order to use the service properly, an account will need to be requested and created. A file can only be shared with a user with an existing account.
Use the following web interface to manage your account if you don't have TCEQ credentials.
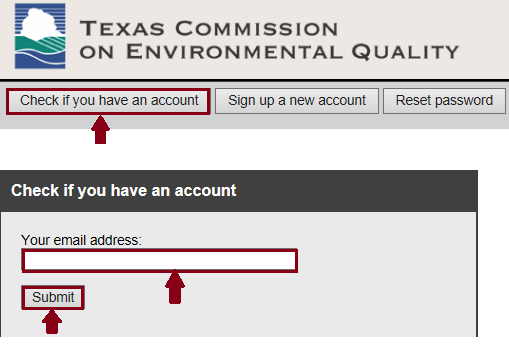
Check if you have an Account
1. Use your browser to go to https://ftps.tceq.texas.gov/ut.php.2. Select the Check if you have an Account button.
3. Enter your email address and select Submit.
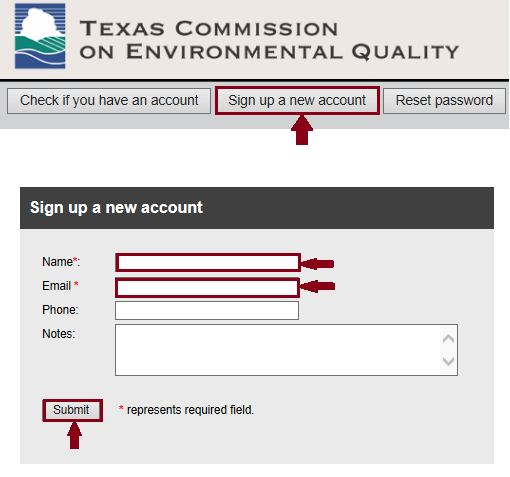
Sign up for a New Account
1. Use your browser to go to https://ftps.tceq.texas.gov/ut.php.2. Select the Sign up a new account button.
3. Enter the required information and select Submit.
4. An email will be sent to the email address you provided. Follow the instructions in the email to set your password.
Note: Please use the same computer to submit the request and to check the email.
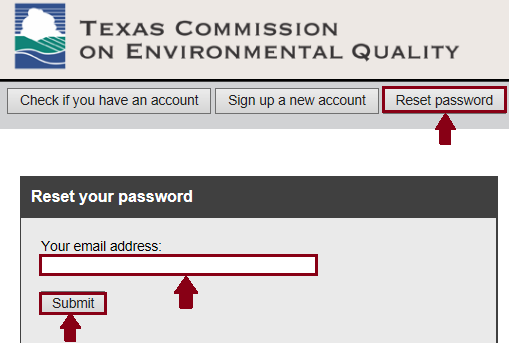
Reset Password
1. Use your browser to go to https://ftps.tceq.texas.gov/urp.php.2. Select the Reset Password button.
3. Enter your email address and select Submit.
4. An email will be sent from ftp_account@tceq.texas.gov. Follow the instructions contained in the email message to reset your password. Passwords must be at least 8 characters long and must include a lower-case letter, a capital letter, and a number.
Note: Please use the same computer to submit the password reset request and to check the email.
Go to top of the page
Log in and Log out
TCEQ staff will use their existing TCEQ account to login. All other customers will use a TCEQ FTPS account to login.
To access TCEQ FTPS:
1. Use your browser to go to https://ftps.tceq.texas.gov/
2. Enter your account name and password.
3. Click the Login button.
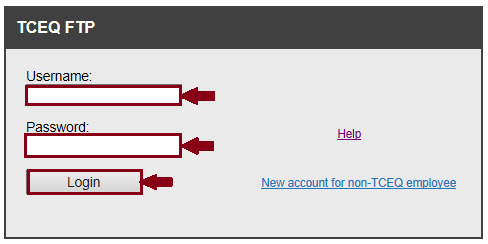
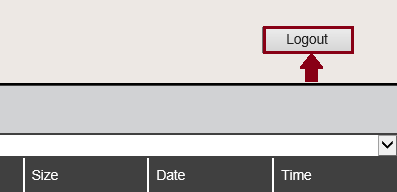
4. When you are ready to exit, click the Logout button on the right top corner.
Go to top of the page
Web Interface
 Folders are often called directories and documents are called files. For these instructions, the terms folders and files will be used.
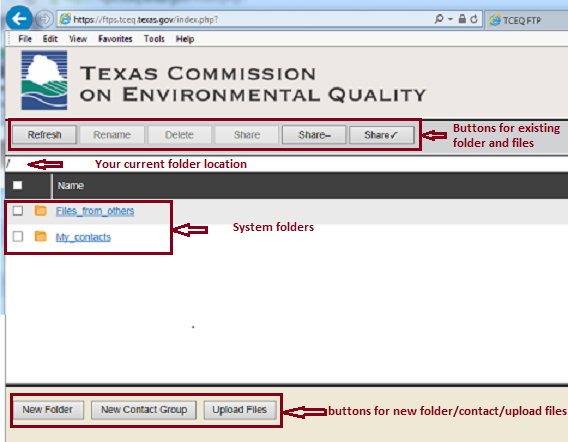
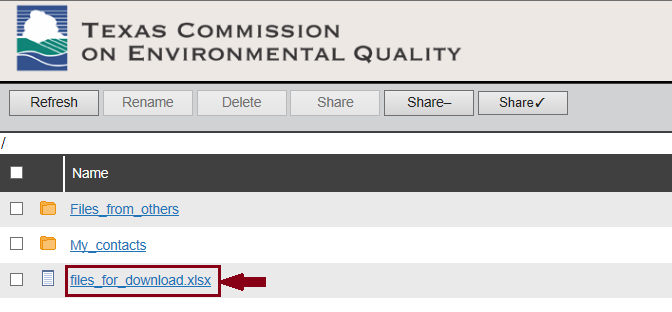
Buttons at the top are actions available for existing folders and files. Actions that are available are displayed in black. Actions that are not available are displayed in gray and cannot be selected. Below the top buttons is a white bar with your current folder location. At log in, you are placed in your home folder called "/". As you change folders, your current folder location will displayed. The middle of the screen lists existing folders and files. Buttons at the bottom of the screen show actions available to create new folders and files, including uploading files to be shared.
At initial log in, two system folders are provided for each account. These are Files_from_others and My_contacts. To go to a folder, simply click on the folder name. A folder can contain both folders and files. To return to the parent folder, click on the top row with the label "...".
Files_from_others contains all folders or files others are sharing with you. You can go to any folder by clicking the name, or you can download any file by clicking the file name. Files that have been shared with you will be contained in a folder with the account name of the person who is sharing the file with you.
My_contacts contains email addresses, called contact groups, that can be used to share files. A contact group can be an individual email address associated with a name, or it can be a list of email addresses and names. These are provided as a way to store email addresses that you frequently use. When you share files with others, you can use these contact groups.
You can upload files under the root directory, or you can upload files to folders you have previously created using the "New Folder" button. Files can be shared from any folder location.
Go to top of the page
Upload Files with Web Interface
There are 3 different ways to upload files into TCEQ FPTS: the Upload Files button, drag and drop, or FileZilla. Files that are no larger than 2GB can be uploaded with the Upload Files button or drag and drop. We recommend using FileZilla to upload files larger than 2GB, or if you have difficulty uploading files with either the Upload Files button or drag and drop.
Upload Files with the Upload Files Button
1. Click the Upload Files button to go to the file browse screen.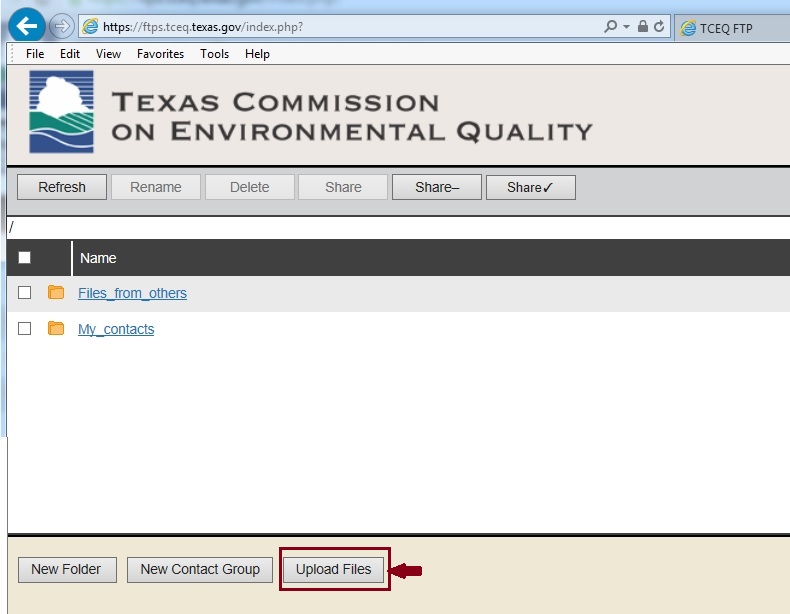
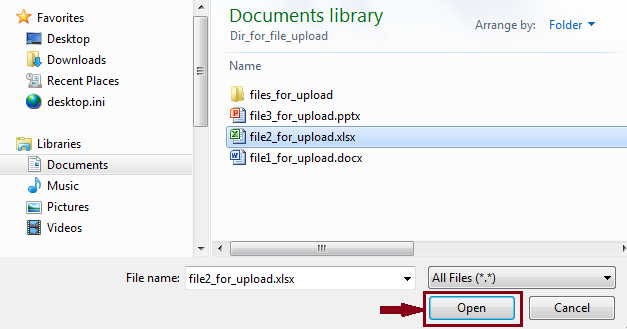
2. Locate and specify which file on your computer you want to upload.
3. Click the Open button to start uploading.
Go to top of the page
Upload Files with Drag and Drop
1. Open "My computer" or "Windows Explorer", and find the files you want to upload.2. Click once on the file to select and highlight the file.
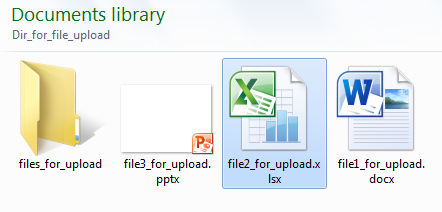 3. Click and hold the left mouse button down on the highlighted file, drag the file to the FTP browse window, and release the left mouse button.
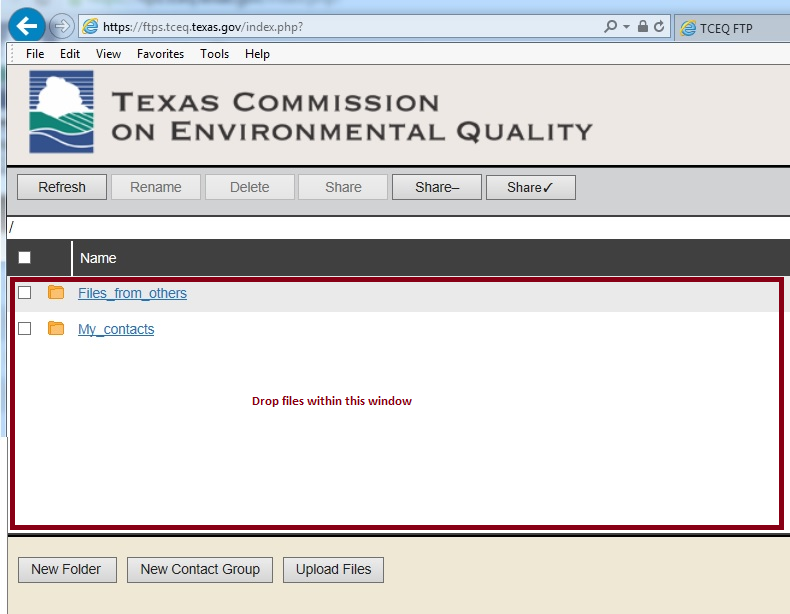
4. The file upload progress window will display. You can check the file uploaded correctly when it is done by comparing the file size.
Go to top of the page
Upload Files with Filezilla
- 1. Open FileZilla:
- a. Select "Start" on your computer, and then select "All Programs"
- b. Select "FileZilla FTP Client", and then select "FileZilla"
- 2. Connect to the server using FileZilla:
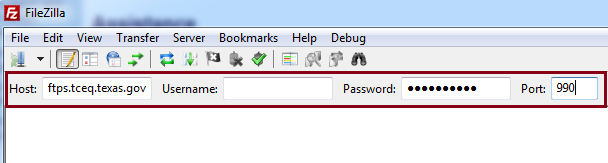
- a. Type the server name (ftps.tceq.texas.gov) in the "Address" box in the area located near the top of the FileZilla window.
- b. Type your user ID in the "Username" box (next to "Address") followed by the password in the "Password" box.
- c. Type 990 in the "Port" box (next to "Password").
- d. Press "Enter".
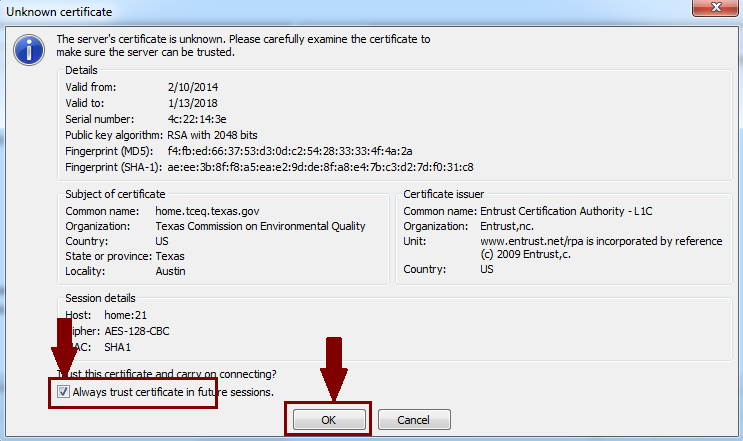
- e. If this is the first time for you to log into TCEQ FTPS with your account, FileZilla will pop up a window showing the certificate. Check "Always trust certificate in future session", and click "OK".
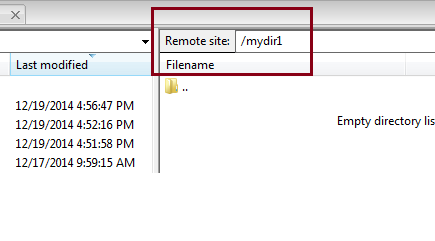
- 3. At log in, you are placed in your home folder called "/". You can upload your files directly under your home folder "/", or you can create new subfolders and upload the files under these subfolders on the server using the "Remote Site" window on the right.
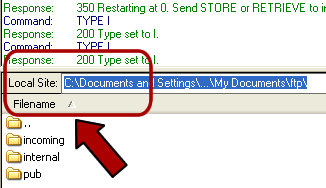
- 4. Find the source directory (the directory from which the file will be copied) and file on the local drive using the "Local Site" window on the left.
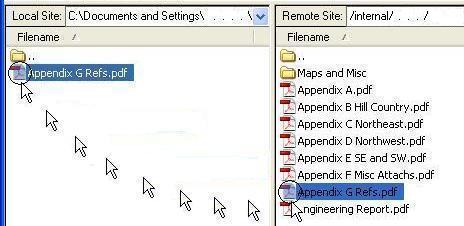
- 5. Drag (or double-click) the local file from the "Local Site" to the "Remote Site".
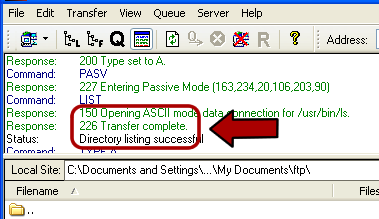
- 6. Verify that the transfer took place.
- 7. From the main menu, select File and Disconnect to end your session.
Go to top of the page
Download Files with Web Interface
Since files are shared for only a limited amount of time, files that are needed for longer than the shared time should be downloaded to your host machine and saved to another location. Download is only available for files. Files can be downloaded with TCEQ FTPS or FileZilla.
Download Files with TCEQ FTPS
1. In TCEQ FTPS, locate the file you want to download.
2. Click the file name to start downloading.
3. Downloading will begin, and you will receive a downloading message.
Go to top of the page
Download Files with Filezilla
- 1. Open FileZilla and connect to the server. See Connect to the server using FileZilla for more detail.
- 2. Find the destination directory (the directory to which the file will be saved) and file on the local drive using the "Local Site" window on the left.
- 3. Locate source directory (the directory from which the file will be copied) on the server using the "Remote Site" window on the right.
- 4. Drag (or double-click) the file from the "Remote Site" to the "Local Site".
- 5. Verify that the transfer took place.
- 6. From the main menu, select File and Disconnect to end your session.
Go to top of the page
Share Files with Others
If a file is updated after it has been shared, the file must be shared again for the recipient to have the updated file. An updated file that is shared again will replace the original file with the same name. If a file is deleted, the file will still be shared unless the file is unshared or is older than the 7 day share retention time.
Folders are also shared at the time the Share is established. If files within folders are changed after a folder is shared, the folder must be shared again for the recipient to have the folder updates.
To Share folders or files:
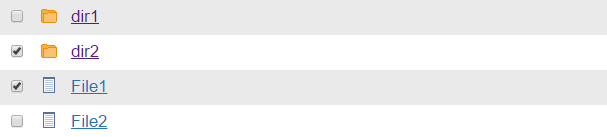
1. Select the folders and files you want to share by clicking the checkbox. A checkmark will appear if the folder or file is selected.
2.Click the "Share" button

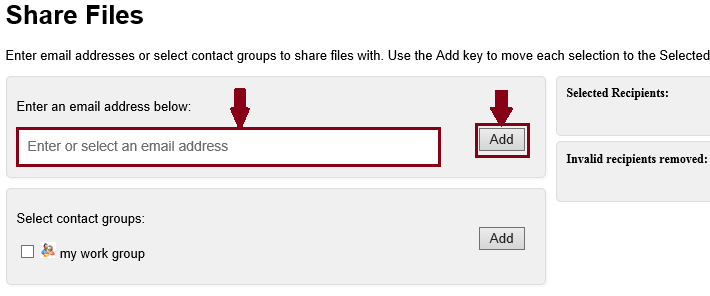
3. Enter or select recipients to share folders or files:
a. Type the email address into the "Enter or select an email address" and click the "Add" button.
b. TCEQ staff can also use pattern matching to select the recipients in the "Enter or Select an email address". Type letter or number combinations to match first name, last name, or phone number. If the letters or numbers are not continuous, use the "space" key to separate them. As you type more, system will narrow the matches that are displayed. Select the email address and click the "Add" button. This option is not available for non-TCEQ staff.
 c. Select one or more Contact Groups by clicking the check boxes and then click the "Add" button.
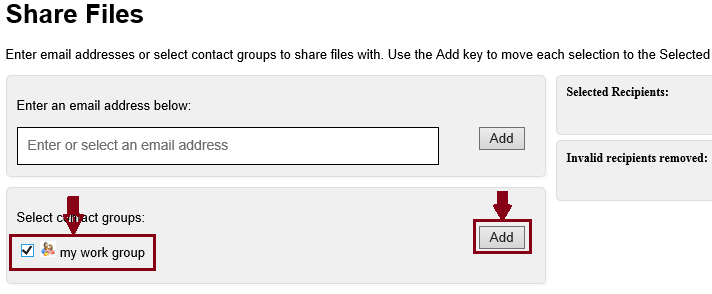
4. Valid email addresses you select will be displayed in the upper right corner under Selected Recipients.
5. Invalid email addresses will be displayed under Invalid Recipients. There are several reasons an email address can be invalid:
a. TCEQ staff can only share files with non-TCEQ staff that have an existing account that includes the receiving email address.
b. Non-TCEQ staff are only allowed to share files with TCEQ staff.
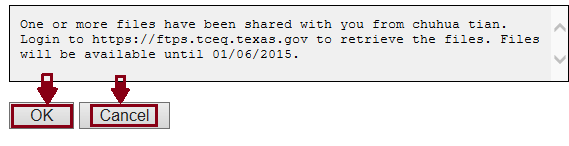
6. Confirm the file sharing. Select "OK" to share the folders and files and move to next step. Select "Cancel" to start over.
7. For your convenience, a sample email is provided for you to send to your recipients. Modify the text and select OK to send the email, or select Cancel to skip sending the email notification.
Remove Shared Files
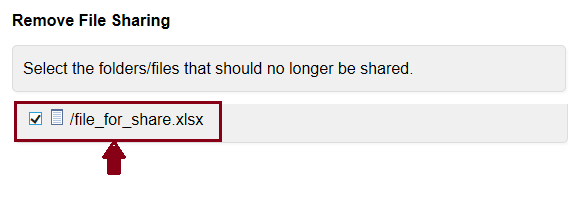
1. Select the folders or files you no longer want to share, and then select the "Share-" button. If you do not select any folders or files, a pop up window will display all folders and files you are currently sharing with others.

2. Select the checkbox next to folders or files you want to remove from sharing and select OK. Selecting a checkbox next to Person will remove sharing for all folders and files with the displayed email addresses.
3. Confirm the items that you are removing from being shared. Select the "OK" button to confirm.
Go to top of the page
Check Shared Files
1. If you want to check which folders or files you are sharing with others, select the "Share✓" button.

2. Folders and files you have shared will be displayed.
Go to top of the page
Contact Groups
Contact groups can be found in the My_contacts folder under your home folder when you log in. Contact groups contain email addresses that can be used to share files. A contact group can be an individual email address associated with a name, or it can be a list of email addresses and names. Contact groups are provided as a way to store email addresses that you frequently use when you share files with others.
You can put all your contact groups directly under the My_contacts folder, or you can organize them in My_contacts sub-folders. Sub-folders can be created using the "New Folder" button.
Create a New Contact Group
You can create a new contact group from any folder. If your current folder location is under My_contacts or a sub-folder, the new contact group will be saved in your current folder. Otherwise the new contact group will be saved in the My_contacts folder.1. Select the "New Contact Group" button.
2. Enter a contact group name and enter one or more email addresses with one email address per line.
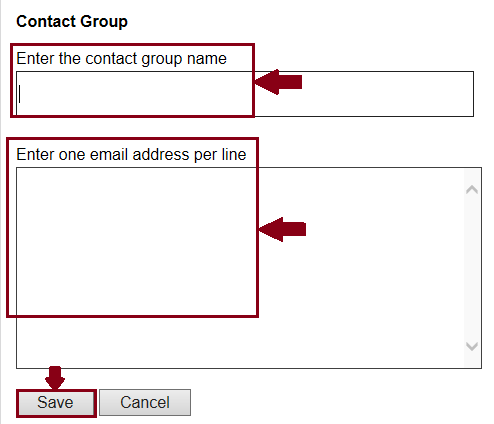
3. Select the Save button to save the contact group.
Upload a Contact Group File from your Computer
Contact groups are stored in files. Files in the correct contact group format can be uploaded from your computer to My_contacts or its subfolders. The file format must include valid email addresses with one email address per line and the file must be smaller than 5K. Contact group files that do not meet this format will be rejected by the system for uploading to the folder.See Upload Files to Share for steps to upload files.
Contact Group File Retention
Contact group files are not automatically deleted by the system. You should download these files to a more permanent storage location as backup.Using Contact Groups to Share Files
Contact group folders or files can be shared with others like other regular folders or files.See Share Files with Others for steps to use contact groups to share files.
Go to top of the page
Contact Us
To contact us select "QUESTIONS or ISSUES: CONTACT US" in the bottom left corner of each screen, enter the required information, and select Submit.
Go to top of the page